Instructions
The Fence Rail Tab Fork is used to push in the tabs on the rails that lock it into the fence post. This tool provides a quick and easy way to depress the tabs.
Wear the appropriate safety gear. Refer to OSHA and ANSI standards. Gloves and eye protection are required. Additional safety gear may be needed depending on the location and construction site requirements. Nothing in these instructions should replace common sense regarding safety. Should any concerns arise, please stop, and get assistance from a safety professional.
- Ensure that you have the correct size Tab Fork for your fence. This is measured across the top of the rail and inside of the Tab Fork. They should measure approximately the same. The Tab Fork gap may be slightly smaller than the rail to squeeze the tabs. The most common sizes are 1.5 and 2 inches (38.1mm and 50.8mm).

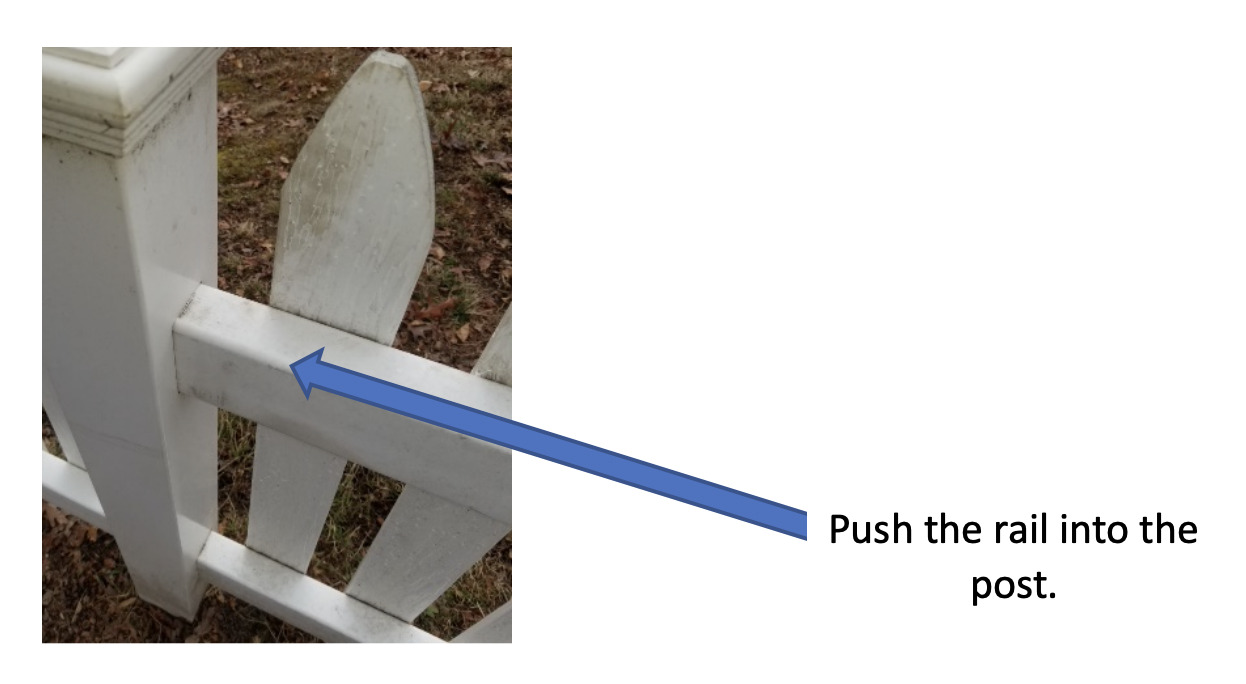
- Remove the cap on both fence posts where you wish to remove the rail. This will allow you to look inside the post to ensure that the rails have tabs and not screws holding the rail in the post. If you have screws, there is no further need for this tool. If you have tabs, push the rail into the post so that the tabs are away from the side of the post. This will ensure that the Fence Rail Tab Fork is able to push the tabs in completely. *** Important – check for space in the second fence post. There needs to be room in the second post so that the rail can slide in far enough, so the tabs come out of the post where the tool being used.
Push the Fence Rail Tab Fork around the rail directly over the tabs. Holding it against the fence post really helps keep it from slipping off the end of the rail. The tapered ends of the Tab Fork will allow the tool to be pushed over the tabs without breaking. Position the string near the handle outside the post or tie it off so it can be used to recover the tool should it drop into the post.
If you have ordered the 36-extension – getting the Fence Rail Tab Fork over the bottom rail may take some practice due to the length and lack of visibility. With practice it becomes second nature. Holding it against the fence post as you push it down helps as well.
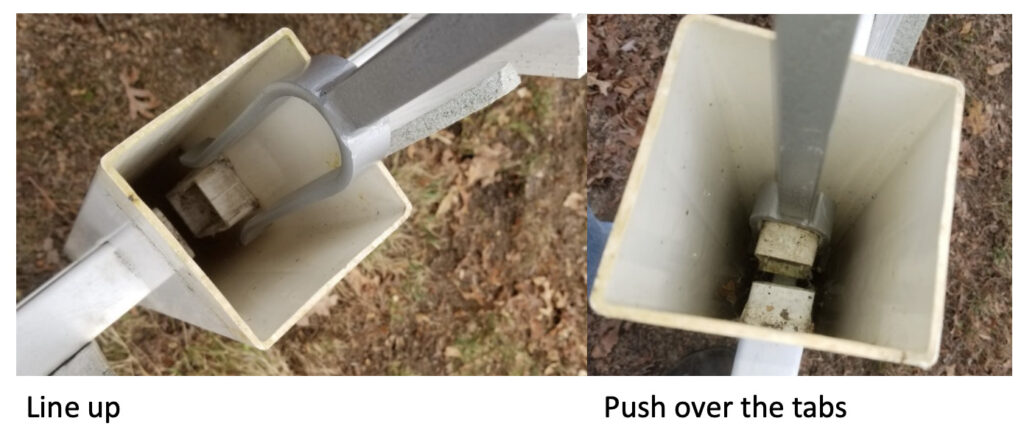
It is best if the part of the tab that is sticking out the most is in the center of the fork.
With the Tab Fork in place the fence rail can be pulled through the post. Depending on the fence manufacturer some rails will be easy, others will take a considerable force to pull through the hole in the post.
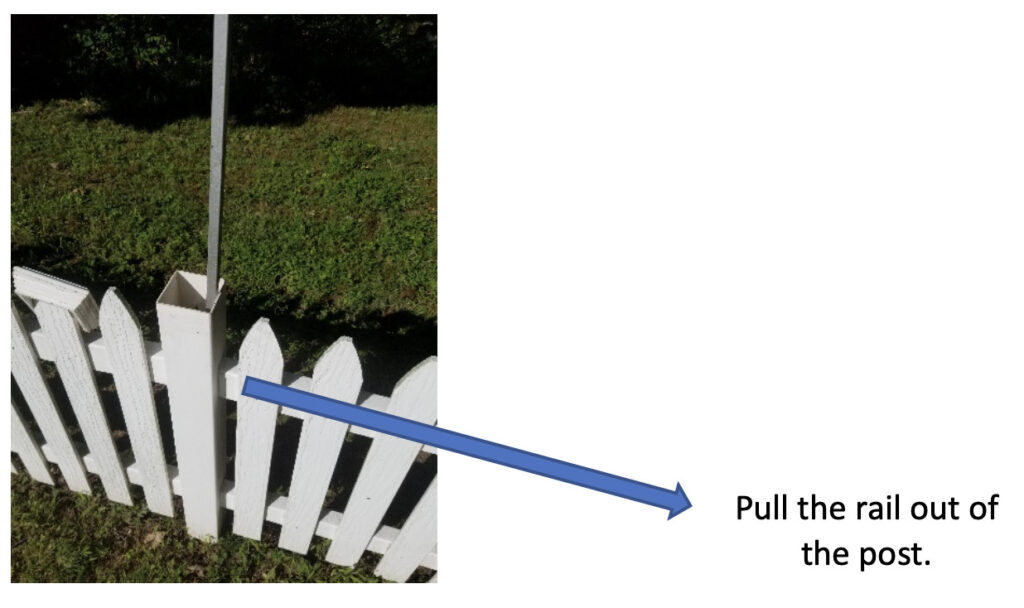
- When the rail is pulled out of the post, the Tab Fork will slide off the end and fall into the post. Use the string that was previously positioned outside the post to pull the Tab Fork up and repeat the process for the lower rails.
Extra Tips:
a. The older the fence, the more brittle, dirty, and dried it may be. A little spray lubricant on both sides of the rail can make it easier to insert the fork over the rail and pull the rail out of the post. Just make sure the lubricant used does not stain the fence.
b. If the rail comes out some but a tab is still stuck, reposition the Tab Fork over the tabs and pull the rail out of the post.
The California P65 warning:
Warning: This product can expose you to chemicals including DI(2-Ethylhexyl) Phthalate which is known to the state of California to cause cancer and birth defects or other reproductive harm and DIIsononyl Phthalate which is known to the state of California to cause cancer. For more information, Go to www.P65warnings.CA.GOV
Any issues or concerns, please use the contact info below:
E-mail – [email protected]
E-mail – https://www.vinylfenceremovaltool.com
Owner – Andrew Smith
Cell – 443-303-9085